“Stay Warm, Save Money: The Benefits of R60 Attic Insulation for Utah Homes”
Introduction
In Utah, where the summers are hot and the winters can be bitterly cold, having proper attic insulation is crucial. Upgrading to R60 insulation can make a world of difference in your home’s energy efficiency, comfort, and overall value. This guide will explore why upgrading to R60 is beneficial, how to do it, and what you need to know to get started.
Understanding R60 Insulation
What is R-Value?
The R-value measures an insulation material’s resistance to heat flow. The higher the R-value, the better the material insulates. R60 is a high standard in insulation, offering excellent thermal resistance. Understanding R-value is essential. It tells you how well your home can keep heat in during winter and out during summer. An R-value of 60 means the material has a high capacity to resist heat flow, making your home more energy-efficient.
Why R60?
R60 insulation is particularly effective in reducing heat transfer. This means your home stays warm in the winter and cool in the summer. It’s ideal for attics, where heat loss and gain can be significant. With R60 insulation, you can achieve an optimal balance between energy savings and comfort. It’s a smart investment for any homeowner looking to improve their home’s performance.
Benefits of Upgrading to R60 Insulation
Enhanced Energy Efficiency
By upgrading to R60 insulation, you significantly reduce the amount of energy required to heat and cool your home. This results in lower utility bills. Studies show that homes with proper insulation can save up to 20% on heating and cooling costs. With R60, these savings are maximized, as the high R-value ensures minimal heat loss in winter and heat gain in summer.
 Improved Indoor Comfort
R60 insulation helps maintain a consistent indoor temperature, eliminating drafts and cold spots. This creates a more comfortable living environment year-round. Imagine no longer needing to bundle up in blankets during winter or constantly adjusting the thermostat in summer. R60 insulation ensures your home remains at a comfortable temperature, providing a pleasant environment for you and your family.
Increased Home Value
Homes with high-quality insulation are more attractive to potential buyers. Upgrading to R60 can increase your home’s market value and appeal. Prospective buyers often look for energy-efficient features, knowing they can lead to long-term savings. By upgrading to R60 insulation, you make your home more appealing on the market, potentially leading to a higher resale value.
Environmental Impact
Using less energy for heating and cooling reduces your carbon footprint. Upgrading to R60 insulation is an environmentally friendly choice that contributes to sustainability. Reducing energy consumption helps lower greenhouse gas emissions, playing a part in combating climate change. By investing in R60 insulation, you benefit your home and the planet.
Noise Reduction
R60 insulation improves thermal resistance and helps reduce noise from outside. This creates a quieter and more peaceful indoor environment. Whether it’s the sound of traffic, noisy neighbors, or even rainfall, proper insulation can significantly dampen these noises, providing a serene atmosphere inside your home.
Preventing Ice Dams
In colder climates like Utah, proper attic insulation prevents the formation of ice dams, which can cause significant roof damage and leaks. Ice dams occur when heat escapes through the roof, melting snow, which then refreezes at the eaves. By keeping your attic well-insulated with R60, you can prevent this cycle, protecting your roof and home from potential damage.
Assessing Your Current Insulation
Evaluating Existing Insulation Levels
Before upgrading, you need to assess your current insulation. Check the depth and condition of your existing insulation. If it’s below the recommended level or shows signs of wear, it’s time for an upgrade.
Signs Your Insulation Needs Upgrading
- Uneven temperatures in different rooms
- High energy bills
- Drafts or cold spots
- Ice dams on the roof
- Visible gaps in insulation
Tools and Techniques for Measuring Insulation
Use a ruler or tape measure to check the depth of your insulation. Compare it against the recommended levels for your region. Infrared cameras can also help identify areas of heat loss. These tools are invaluable for a thorough assessment, helping you determine exactly where improvements are needed.
Choosing the Right Insulation Materials
 Fiberglass
Fiberglass is one of the most common insulation materials. It’s cost-effective and offers good thermal resistance. It’s available in batts or loose-fill. Fiberglass is easy to install, but it must be handled carefully to avoid skin irritation. It’s effective but can lose its insulating properties if compressed.
Cellulose
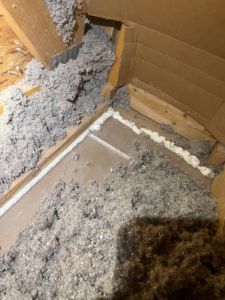
Made from recycled paper, cellulose is an eco-friendly option. It’s treated for fire resistance and can be blown into attics, providing good coverage. Cellulose settles over time, but it’s dense and provides excellent thermal resistance. It’s also effective at blocking air leaks.
Spray Foam
Spray foam insulation offers excellent thermal resistance and air sealing properties. It’s more expensive but provides superior performance. Spray foam expands to fill gaps and crevices, creating a tight seal. It’s ideal for irregular spaces and provides both insulation and air sealing in one application.
Rigid Foam Boards
Rigid foam boards offer high R-values per inch of thickness. They’re ideal for tight spaces and can be used in combination with other insulation types. Foam boards are durable and resistant to moisture, making them suitable for areas where moisture control is crucial. They are, however, more expensive and can be harder to install than other types.
Pros and Cons of Each Material
- Fiberglass: Affordable, easy to install, but can lose effectiveness if compressed.
- Cellulose: Eco-friendly, good coverage, but can settle over time.
- Spray Foam: Excellent performance, air sealing, but higher cost.
- Rigid Foam Boards: High R-value, durable, but can be expensive and harder to install.
Consider your budget and the specific needs of your home when choosing insulation materials. For example, spray foam might be best for sealing air leaks, while fiberglass can be a cost-effective option for general insulation.
Preparing for an Insulation Upgrade
Assessing the Scope of the Project
Determine how much insulation you need and identify any areas that require special attention, such as around vents or chimneys.
DIY or Hire a Professional?
Decide whether you want to tackle the project yourself or hire a professional. DIY can save money, but professional installation ensures the job is done correctly. Weigh the pros and cons of each option. If you choose to DIY, ensure you have the necessary skills and tools.
Gathering Necessary Tools and Materials
Ensure you have all the tools and materials you need, including insulation, a ruler, safety gear, and any other equipment required for installation. Proper preparation can make the process smoother and more efficient.
Ensuring Proper Ventilation and Addressing Moisture Issues
Proper ventilation is crucial to prevent moisture buildup, which can lead to mold and rot. Install vapor barriers if necessary and ensure your attic is well-ventilated. Good ventilation helps maintain the longevity and effectiveness of your insulation.
Step-by-Step Guide to Upgrading Insulation to R60
Preparation
- Clear the Attic: Remove any items stored in the attic to create a clear workspace. This ensures you have enough room to work and reduces the risk of accidents.
- Seal Air Leaks: Use caulk or spray foam to seal any gaps or cracks. Air leaks can significantly reduce the effectiveness of your insulation.
- Install Vapor Barriers: If needed, install vapor barriers to prevent moisture issues. This is particularly important in areas prone to high humidity.
Removing Old Insulation
- Safety First: Wear protective gear to avoid exposure to dust and fibers. Safety goggles, gloves, and a mask are essential.
- Careful Removal: Remove old insulation carefully, especially if it contains hazardous materials like asbestos. Follow local regulations for disposal.
Installing New Insulation
- Fiberglass Installation: Lay fiberglass batts or blow in loose-fill to the desired depth. Ensure even coverage and avoid compressing the material.
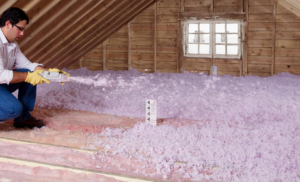
- Cellulose Installation: Use a blower to distribute cellulose evenly across the attic. This helps achieve a uniform layer.
- Spray Foam Installation: Apply spray foam in layers, ensuring even coverage. Spray foam expands, so apply it carefully to avoid overfilling.
- Rigid Foam Board Installation: Cut and fit foam boards to cover surfaces, sealing gaps with spray foam. This method is ideal for tight or irregular spaces.
Final Checks and Adjustments
- Inspect for Gaps: Ensure there are no gaps or compressed areas. Gaps can reduce the effectiveness of your insulation.
- Add Additional Layers: If necessary, add more layers to achieve R60. Ensure each layer is applied evenly.
- Verify Insulation Depth: Use a ruler to check that the insulation reaches the desired depth. This ensures you meet the R60 standard.
Case Studies: Successful R60 Insulation Upgrades in Utah
 Example 1: The Smith Family Home
- Before: High energy bills, uneven temperatures.
- After: Lower energy costs, improved comfort.
- Testimonial: “Upgrading to R60 insulation made our home much more comfortable and reduced our heating bills significantly.”
Example 2: The Johnson Residence
- Before: Ice dams, cold spots.
- After: No more ice dams, consistent indoor temperatures.
- Testimonial: “We noticed a big difference in our home’s warmth after upgrading our insulation.”
Costs and ROI of R60 Insulation
Breakdown of Costs
- Materials: Cost varies by type (fiberglass, cellulose, etc.).
- Labor: Professional installation adds to the cost but ensures quality.
- Additional Expenses: Removing old insulation, sealing air leaks, etc.
Expected Return on Investment
- Energy Savings: Significant reduction in heating and cooling costs.
- Increased Home Value: Higher resale value and market appeal.
Financing Options and Incentives
- Loans and Grants: Explore financing options for energy-efficient upgrades.
- Rebates: Check for local or federal rebates for insulation improvements.
Common Challenges and How to Overcome Them
Limited Attic Space
Use rigid foam boards or spray foam for tight spaces to maximize insulation without compromising space.
Recessed Lighting and Obstacles
Use insulation covers for recessed lights and carefully insulate around obstacles to ensure even coverage.
Older Homes
Older homes may have unique challenges like outdated wiring or structural issues. Address these before insulation.
Maintenance and Longevity of R60 Insulation
Tips for Maintaining Optimal Performance
- Regular Inspections: Check insulation periodically for signs of wear or damage.
- Seal Leaks: Ensure that air leaks remain sealed over time.
- Prevent Moisture: Maintain proper ventilation to avoid moisture buildup.
Signs That Insulation May Need Refreshing
- Increased Energy Bills: Rising energy costs can indicate insulation issues.
- Temperature Fluctuations: Inconsistent indoor temperatures may mean insulation needs attention.
FAQs About R60 Insulation Upgrades
- How long does it take to upgrade to R60 insulation?
- The timeline varies based on project scope but typically ranges from a few days to a week.
- Can I install R60 insulation myself?
- Yes, but professional installation ensures optimal performance.
- Is R60 insulation worth the cost?
- The energy savings and increased home value often outweigh the initial investment.
Conclusion
Upgrading your attic insulation to R60 is a smart investment that enhances energy efficiency, comfort, and home value. Whether you choose to DIY or hire a professional, the benefits are substantial and long-lasting.
Take Action
- Free Consultation: Contact us for a free energy audit and insulation consultation.
- Subscribe: Sign up for our newsletter for more home improvement tips.
- Contact Us: Schedule your R60 insulation upgrade today.

